

Tools/Supplies:
- Long candles from the dollar store (to fill 6 teacups I used 10 long candles) $1.25 per 2/pack
- Wicking from a craft store (I chose the cheapest kind with the longest wick) $4.50 for 6
- Teacups! I had 3 old ones already that I could use from my Grandmother and I found 3 more at the Salvation Army Thrift Store for about $3.99 each (look for ones that aren't part of a set and check the bottom to make sure they're fine bone china)
- Chopsticks
- Tape
- Scented oils. I bought one at the craft store for $4.00 (pomegranate) and then in a stroke of genius remembered we had long forgotten ones in the house and found lavender and vanilla spice! Huge win.
***The other sites will tell you that you need sticky wax or a glue gun, a double boiler, a candy thermometer, and tongs. These are VICIOUS LIES. You will soon see.***
What to do:
1. Choose a pot, turn on your element to medium-low (3 or 4), and break about 1 and 1/2 long candle pieces into it for one teacup. 2. Melt it down and fish out the old wicking.
3. Dip a knife into the hot wax and dab a little onto the bottom of your wick (this will keep it from escaping). While the wax is still warm squish the metal bottom into your teacup right in the centre. Drop some more hot wax around the metal bottom of the wick to secure it a bit more.
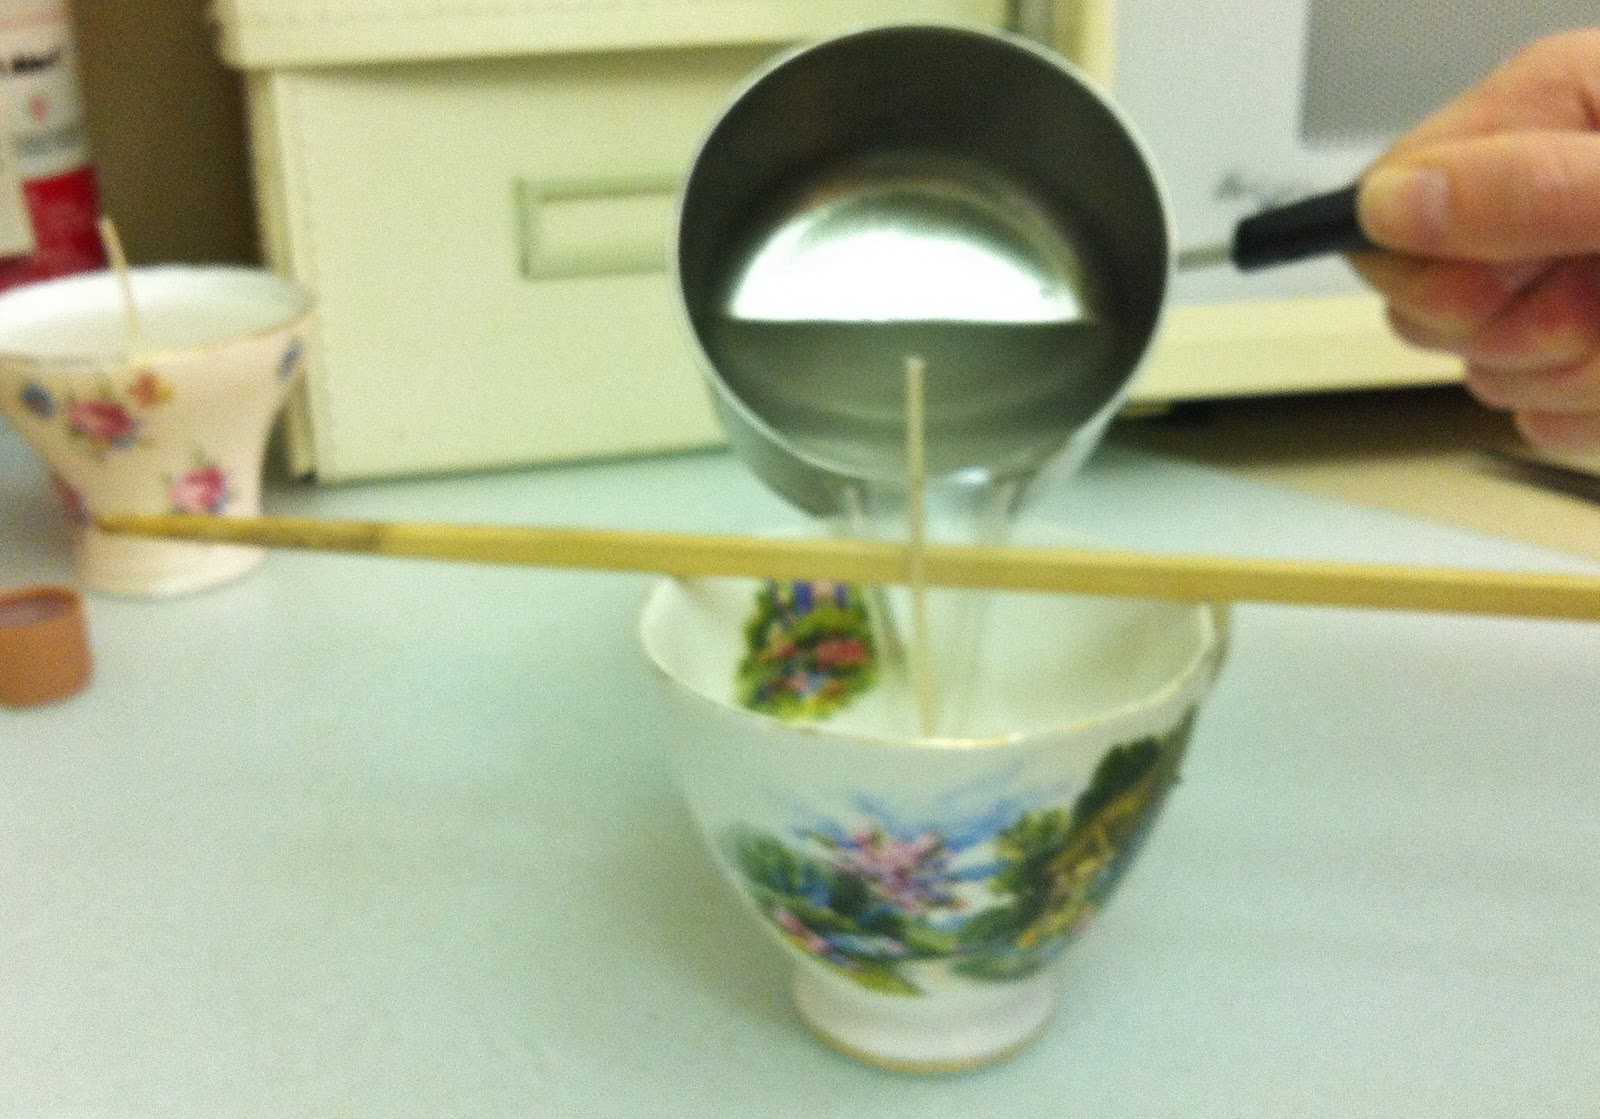
4. Prep your teacup. Using a chopstick, lay it across the teacup and tape the wick to it. If you bought the extra long wicks trim it down at this point so it's shorter, but with a couple of inches sticking up over the top of your teacup and chopstick. You will trim it down to the size you want when the wax is poured and set.

 5. Back at the stove, add your essential oils to the hot wax. I found 10 drops nice and perfume-y, but test it out with your own nose and oils, you can always add more once you have poured it into the teacup while the wax is still hot.

 2. Melt it down and fish out the old wicking.
3. Dip a knife into the hot wax and dab a little onto the bottom of your wick (this will keep it from escaping). While the wax is still warm squish the metal bottom into your teacup right in the centre. Drop some more hot wax around the metal bottom of the wick to secure it a bit more.
4. Prep your teacup. Using a chopstick, lay it across the teacup and tape the wick to it. If you bought the extra long wicks trim it down at this point so it's shorter, but with a couple of inches sticking up over the top of your teacup and chopstick. You will trim it down to the size you want when the wax is poured and set.


6. Pour the wax into the teacup as carefully as you can muster until it is about 1/2 an inch from the top. Adjust your wick if it moved during pouring by pushing it with your chopstick until it is close to centre. You will find the wick weakens as the wax that coats it melts, so it might try to collapse on you.

7. Let it set. Remove the tape from the wick and the chopstick. The wax will have settled with a bit of a well around the wick. The genius Miss Martha says to prick some 1/16 inch deep holes in a circle around the wick, and then pour more hot wax over top of your hardened layer to the height you want.

8. Trim your wick to the desired height, wrap up the CUTEST HOMEMADE CHRISTMAS GIFT EVER, and put it under the tree or in a stocking!!!
Total: 6 ingredients, 8 steps, 28 dollars for 6 teacups, how lovely. If the steps seem complicated to you, don't worry. Once you start it you realize it is a very straight forward process. The melting wicks make it a little delicate to manoeuvre, and don't forget to leave extra wicking a couple of inches above your teacup until the very end when all the wax (including the evening out of the well) is poured.
The finished product (I accidentally gifted before taking a photo of all six ... sigh, because there were some exceptionally cute teacups that are alas not represented here.)


The china is a little translucent with the flame :)
La Fin. Happy Making loves xo.
No comments:
Post a Comment